-- Leo's gemini proxy
-- Connecting to yaky.dev:1965...
-- Connected
-- Sending request
-- Meta line: 20 text/gemini;lang=en-US
Two DIY hardware fixes for PinePhone BraveHeart (v1.1) to address battery drain (VBUS) and USB OTG functionality (VCONN)
I am not responsible for what you do with your device. You will need at least some soldering experience.
PinePhone BraveHeart (v1.1) have two hardware issues:
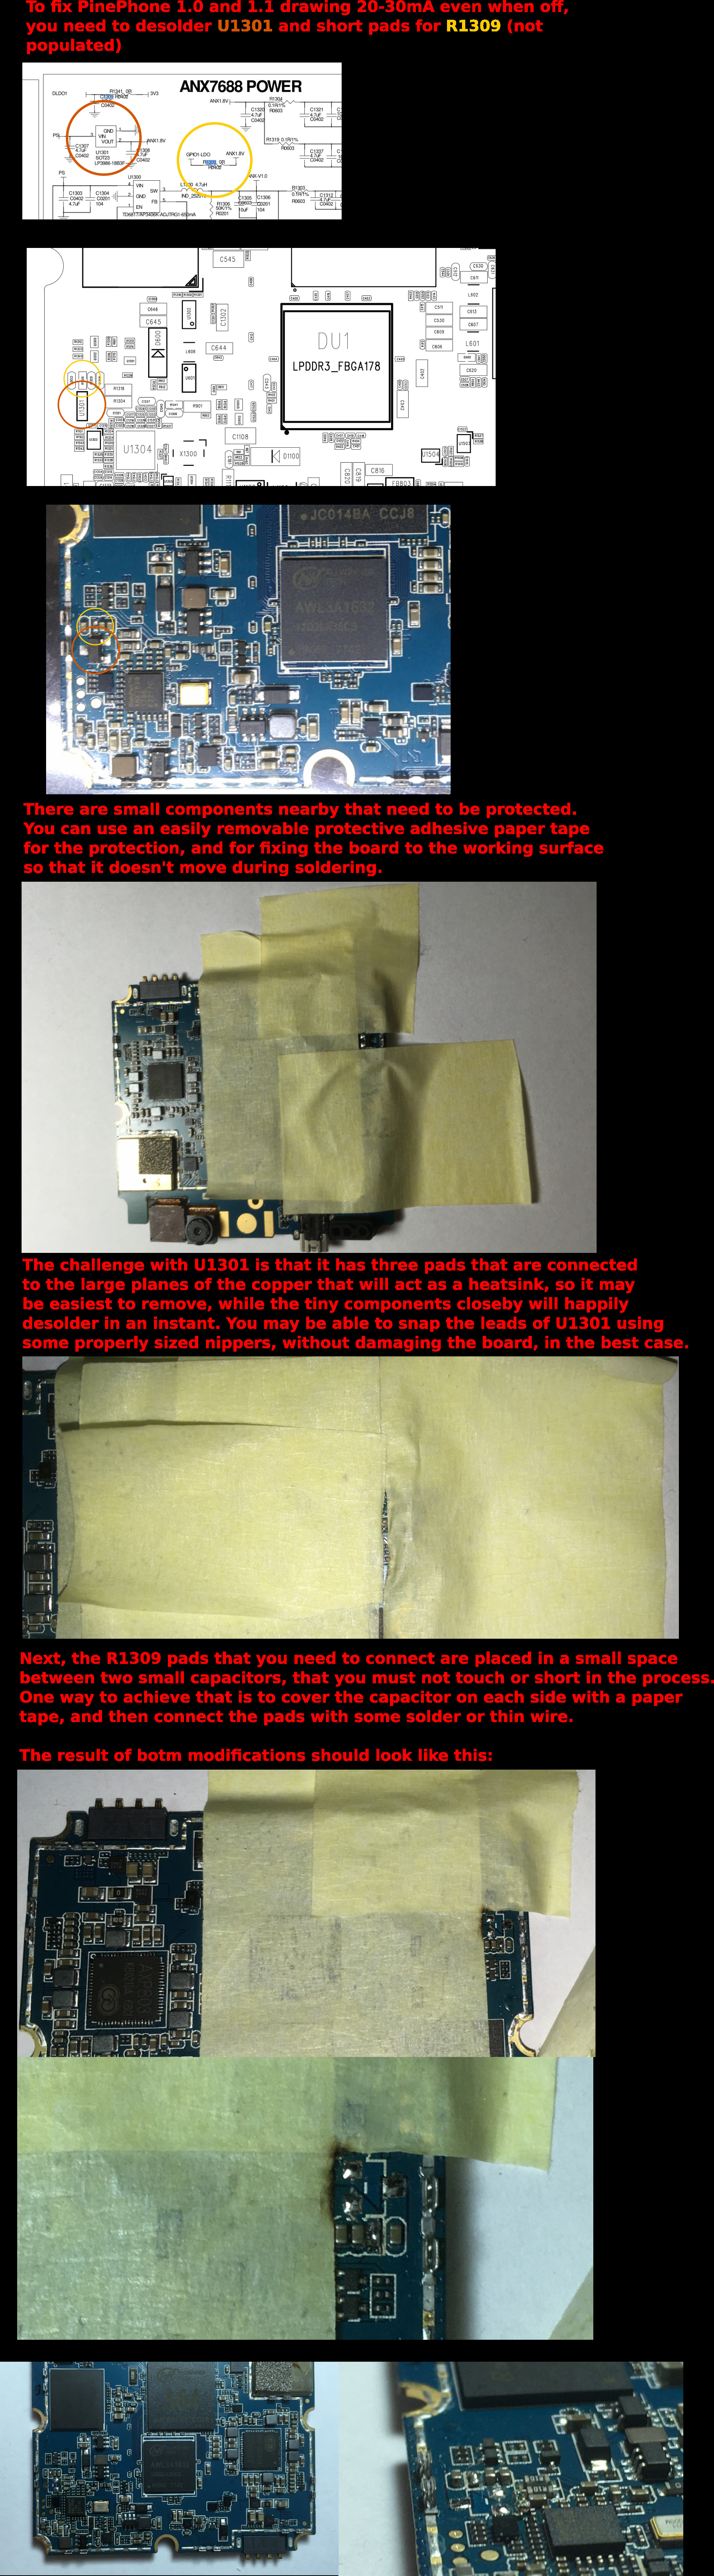
Due to faulty power detection, phone is constantly draining the battery (even when it is off).
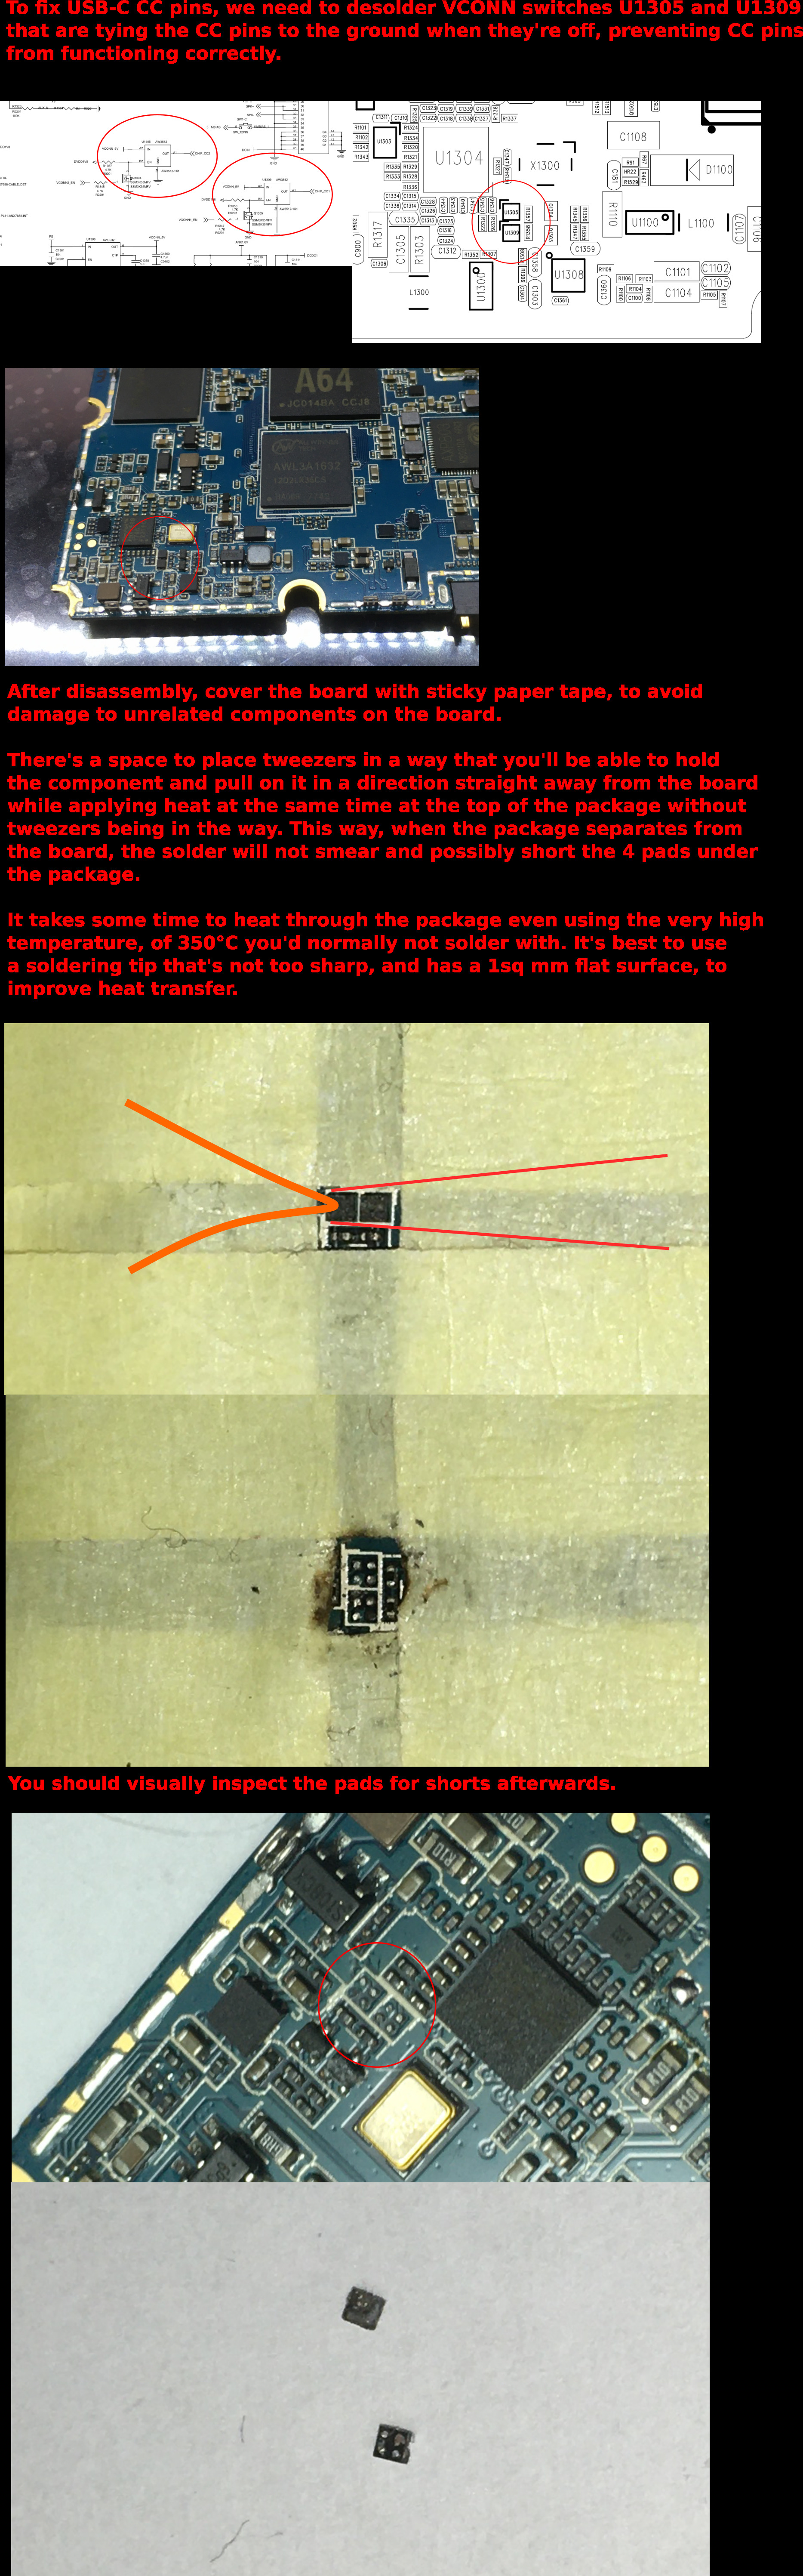
Two chips are incorrectly pulling USB's CC pins to ground, making it impossible to use some USB-C devices.
Take off the back cover and remove the battery.
Remove all 15 screws holding the back panel and remove it.
Disconnect all cables.
Bottom two ribbon connectors (display and touch screen?) and the antenna connector pop up.
Other ribbon cables (cameras, buttons, proximity sensor, and LED) have a hinge that flips up and allows easy removal.
Once all cables are disconnected, carefully pry the motherboard upwards. Use a plastic tool (or a credit card) to avoid damaging the board. It can be a bit frustrating to remove without applying too much force, but starting at the top right corner seemed to work.
This is the side of the motherboard that was facing down in the previous picture.
Remove the metal shield.
Motherboard opened up.
These are the components that will be modified.
For the VBUS fix, the regulator (larger three-legged component) needs to be removed and the two vacant pads above it need to be connected.
For the VCONN fix, two small chips toward the bottom need to be replaced (or removed).
I used kapton tape to shield nearby component from the soldering iron and to prevent the motherboard from moving.
VBUS fix:
The regulator to be removed, close up. I wish I had fine cutters so I could snip the legs first. I did not have much luck desoldering it properly (using a soldering iron at 400C), but I managed to break the top of the regulator off with pliers and then desolder the remaining individual legs. Crude, but it worked.
Next step is to bridge the two vacant pads above. After a few attempts, I finally got it. In the process, I accidentally shifted a neighboring component (but luckily, did not break it off entirely).
This is the result:
VCONN fix:
I removed the two chips by holding them with pliers and twisting clockwise and counterclockwise until they came off. Again, crude, but I don't think I have enough SMD experience to do this properly (remove and replace the part).
The final result:
Close up:
Re-assembly is straightforward. When putting the motherboard back into the body, be careful to not leave any cables under it and watch for the proximity sensor / LED spacer falling out.
PinePhone holds the battery charge noticeably better and the battery does not drain overnight.
However, so far, I was unable to connect and use any USB OTG devices. I tried several USB hubs, a docking station and a keyboard, all with and without external power.
(C) 2024 CC BY Anton Yaky
-- Response ended
-- Page fetched on Fri May 10 07:01:26 2024